
Configure PaloAlto Interface and Ping from LAN

When you are reading for PaloAlto
exam, you need to practice lab sessions to understand basic things. Once you do
lab sessions with different kinds of typologies, you can pass the exam without
any hesitation.
But buying a PaloAlto firewall from a vendor doesn’t practical because
you have to spend money on it and after finishing the exam, that firewall will
lay down on desk or you will put it in your cupboard. I have done some experiment with
GNS3 to build a PaloAlto firewall, like as we implemented Cisco ASA Firewall.
Today I am going to share the lab with you which I have configured and tested
successfully.
PREPARATION
I have installed GNS3 1.3.11 version
on Windows 7 (8 GB RAM) laptop. Your machine’s physical memory is very
important because PaloAlto needs minimum of 4 GB ram to work. Download the PaloAlto
VM ESX (PA-VM-ESX-6.1.0) and install it in a Virtualbox.
PA-VM SETTINGS IN VIRTUALBOX
- General
- Type: Linux
- Version: Red Hat (64 bit)
- System
- Motherboard
- RAM (4 GB minimum)
- Chipset: PIIX3
- Extended Features: Enable I/O APIC
- Processor
- Processors: 2
- Execution Cap: 100%
- Extended Features: Enable PAE/NX
- Acceleration
- Paravirtualization Interface: Default
- Hardware Virtualization: Enable VT-x/AMD-V & Enable Nested Paging

Network Adapter 1 is used to management interface. I have attached network adapter 1 to Host-Only Adapter > VirtualBox Host-Only Ethernet Adapter #2. Make sure to tick on cable connected feature.

At the moment, don’t configure an IP address on the adapter. Remain it
as DHCP mode.
How to add other network adapters? In VirtualBox > File > Preferences > Network

The purpose of adding those adapters: When we deploy PaloAlto firewall in GNS3, we can use this adapters as PaloAlto interfaces (Ex: Inside/Outside/DMZ). Don’t configure any adapter here, just add the adapter and remain it with its default configuration. Don’t worry about the IP addresses and number here.

You can make the topology as shown is the diagram. Drag and drop the PaloAlto firewall and other network devices to make the topology for future configuration.

Login to the Firewall using admin/admin credentials. To check the management IP address, use below command. ‘show interface management’

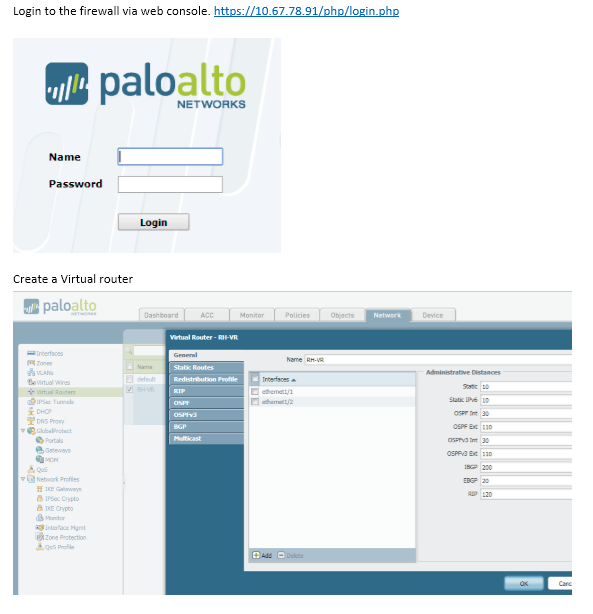
Create Zone

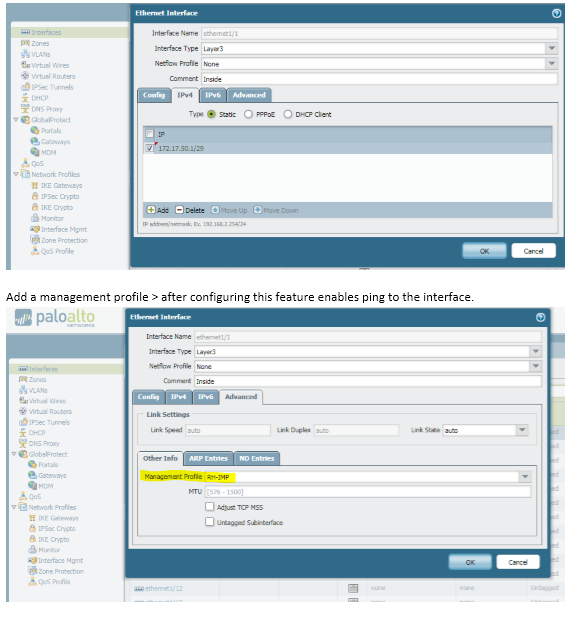


Now switch is able to ping the
inside interface on PaloAlto firewall successfully.
If you have any doubts regards to
this lab and the configuration, don’t hesitate to ask. We will give you the
correct guidelines to troubleshoot your network and solve your problems.
Cheers!


Post a Comment